Tuesday, December 30, 2008

PCI MZK-NAS01SG / MZK-NAS02SG modding

This NAS comes with Linux OS and BT download / iTunes / UPnP DLNA AV Server and can be modified using the Dlink - DNS323 funplug packages Objective of modding (a) Add ssh server (b) Add lighttpd (port 80), php & mysql (c) change the web admin http page to port 81 Steps (1) Upgrade NAS firmware 1.1.2 (2) Setup the BT Downloader and FTP / Samba server via the web admin of the NAS (3) Use telnet to gain access telnet 192.168.1.100 1192 ID: root PASSWORD: password (4) install funplug cd /DataFolder mkdir ffp cd ffp wget http://www.inreto.de/dns323/fun-plug/0.5/fun_plug.tgz tar zxvf funplug.tgz ln -sf /DataFolder/ffp / export PATH=/ffp/bin:/ffp/sbin/:$PATH (5) download funplug packages cd /DataFolder/ffp rsync -av inreto.de::dns323/fun-plug/0.5/packages . (6) start ssh server chmod 111 /ffp/var/lib/sshd sh /ffp/start/sshd.sh start (7) Install lighttpd, php and mysql cd /DataFolder/ffp mkdir -p packages wget http://81.216.140.39/dns-323/mysql_and_php/mysql-5.1.28-rc-1.tgz wget http://81.216.140.39/dns-323/mysql_and_php/php-5.2.6-mysql51-1.tgz funpkg -i mysql-5.1.28-rc-1.tgz funpkg -i php-5.2.6-mysql51-1.tgz chmod u+x /ffp/start/mysqld.sh /ffp/start/mysqld.sh restart /ffp/bin/mysqladmin -u root password 'new-password' ln -s /ffp/var/mysql.sock /tmp/mysql.sock cp /DataFolder/ffp/etc/examples/lighttpd.conf-with-php /DataFolder/ffp/etc/lighttpd.conf cp /DataFolder/ffp/etc/examples/my.cnf /DataFolder/ffp/etc/my.cnf vi /DataFolder/ffp/etc/lighttpd.conf mkdir -p /DataFolder/ffp/etc/www/logs mkdir -p /DataFolder/www/tmp echo '<?php phpinfo(); ?>' > /DataFolder/www/index.php when editing lighttpd.conf change these server.document-root = "/DataFolder/www/" server.upload-dirs = ( "/DataFolder/www/tmp" ) server.errorlog = "/DataFolder/ffp/etc/www/logs/error.log" accesslog.filename = "/DataFolder/ffp/etc/www/logs/access.log" server.port = 80 (8) Modify btdog (so that the modding will be effective even after NAS reboot) mv /DataFolder/.bittorrent/bin/btdog /DataFolder/.bittorrent/bin/btdog_bak vi /etc/protocols and add this line to /etc/profile export PATH=/ffp/bin:/ffp/sbin/:$PATH cp /etc/profile /DataFolder/.bittorrent/bin/profile.bak vi /DataFolder/.bittorrent/bin/btdog the content of btdog is
btdog: Select all
#ledset 4=USB1 6=USB2 7=Power 17=HDD1 18=HDD2, 0=on 1=off #/bin/ledset 4 1 #/bin/ledset 6 1 #/bin/ledset 7 1 #/bin/ledset 17 1 #/bin/ledset 18 1 ln -s /DataFolder/ffp/ /ffp export PATH=/ffp/bin:/ffp/sbin/:/usr/bin:/bin:/usr/sbin:/sbin killall webs nashttpd cp /DataFolder/.bittorrent/bin/profile.bak /etc/profile /DataFolder/ffp/sbin/lighttpd -f /DataFolder/ffp/etc/lighttpd.conf& chmod 600 /DataFolder/ffp/etc/ssh/ssh_host_rsa_key /DataFolder/ffp/etc/ssh/ssh_host_dsa_key /DataFolder/ffp/etc/ssh/ssh_host_key chmod 600 -R /DataFolder/ffp/var/lib/sshd chmod 111 /DataFolder/ffp/var/lib/sshd sh /DataFolder/ffp/start/sshd.sh start cp /DataFolder/ffp/etc/my.cnf /etc/my.cnf chmod 0644 /etc/my.cnf chmod +x /DataFolder/ffp/start/mysqld.sh sh /DataFolder/ffp/start/mysqld.sh start& webs& ln -sf /DataFolder/ffp/var/mysql.sock /tmp/mysql.sock /DataFolder/.bittorrent/bin/btdog_bak /DataFolder/.bittorrent/bin/bt -daemon-loop --default-settings-file /DataFolder/.bittorrent/bin/btsettings.txt
change btdog to be executable chmod +x /DataFolder/.bittorrent/bin/btdog (9) reboot NAS and test lighttpd, php, mysql, ssh and other servers and enjoy installing some more packages from fun-plug see here


Saturday, December 27, 2008

How-to compile and install wget binary in Mac OS X


mkdir -p wget; cd wget
curl -O http://ftp.gnu.org/pub/gnu/wget/wget-latest.tar.gz
tar -zxvf wget-latest.tar.gz
cd *
./configure
make
sudo cp -p src/wget /usr/bin/


Tuesday, December 23, 2008

MSI Wind Notebook Install Mac OS X 10.5.4/5


Here is the guide
http://forums.msiwind.net/mac/how-install-osx-with-and-without-usb-stick-usb-dvd-t4701.html

You need these

for display driver
http://rapidshare.com/files/150202151/GMA950.pkg.zip.html

for wifi
http://www.ralinktech.com.tw/data/drivers/STA_RT2860%20D-1.1.1.0%20UI-1.6.8.0_2008_12_04.dmg

for creating Lepoard install partition in harddisk
http://thepiratebay.org/torrent/4307757/

http://www.iphone.org.hk/attach/48221-Leopard_hd_install_helper_v0.3.zip

Headphone jack switch
http://forums.msiwind.net/mac/news-headphone-jack-works-t4854.html

Front Row update 2.1.2 (so that Front Row can see your iTunes Library if you have upgraded to iTunes 8)
http://supportdownload.apple.com/download.info.apple.com/Apple_Support_Area/Apple_Software_Updates/Mac_OS_X/downloads/061-4397.20080227.gOg5S/FrontRowUpdate2.1.2.dmg

Results for Mac OS X 10.5.4/5 Installation
WinXP / Mac OS X dual boot : OK
Ethernet : OK
Wifi : OK
Speaker : OK
GMA950 Graphics 1024 x 600 : OK
USB Hard Disk : OK
USB HSDPA modem : OK
Bluetooth : OK
Quick Time Player : OK
iPhone SDK Development : OK
WebCam, Photo Booth : OK
Headphone Jack Output : with switch.sh script (see above)

Sound Line Input / mic : failed
Trackpad Scrolling : not working (but you can press the upper / lower right corner of the track pad to slowly scroll)

If you need to upgrade Safari to 3.2.1, you need to first upgrade Mac OS X to 10.5.5 and then update Security Update 2008-007 Client (Leopard)

To upgrade 10.5.5, you can download this update from Apple
http://www.apple.com/downloads/macosx/apple/macosx_updates/macosx1055update.html

After update to 10.5.5, you just need to reinstall the GMA950 driver and everything works except mic / line input

Then download the Security Update 2008-007 here http://www.apple.com/downloads/macosx/apple/security_updates/securityupdate2008007clientleopard.html

Then in the Software Update, you can have the option to upgrade Safari to 3.2.1


FAQ
---
This is how to disable the Realtek utility in startup

sudo mv WiUtilityCardbusPCIStartUp ~/

And also remove it in System Settings -> Accounts -> Login Items

Thursday, December 4, 2008

Create US iTunes Account without credit card

(1) Open iTunes and change iTunes store to United States.

(2) Goto App Store of US and Click to buy a free app

(3) Choose to create a new account and enter email address and password and other questions. Choose none for payment method to create a new iTunes Account. Enter a valid US address (find it in Google), you need valid and matching city (e.g. Piscataway), state(e.g. NJ) and zipcode (e.g. 08854) and telephone number (3 digits for area code and 7 digits for telephone number) e.g. (852)9123456.
If you want to find a valid address in US, you can also make use of Google Map in iPhone. For example, first search a city say San Franciso, then search Starbucks.


(4) If you want to add Store credit to your iTunes Account to buy paid app,
buy US iTunes gift certificate from ebay (search here) or from your friend in US (tell him to email you the Activation Code and the Card Serial Number)

Sunday, November 16, 2008

Install mysql in PowerPC Mac Mini and make php-mysql works

The problem for mysql server in Mac OS X powerpc platform is that there is no binary build for package format (.dmg) for Leopard and the tar.gz binary does not work with the default php5 which uses the unix socket at /var/mysql/mysql.sock plus there is no LaunchDaemon plist. Either you have to change the etc/php.ini or build the mysql server from source.

This guide shows how to build from source

(1) Choose the mirror site and download the source tar.gz file
http://dev.mysql.com/get/Downloads/MySQL-5.1/mysql-5.1.29-rc.tar.gz/from/pick#mirrors

(2) untar and unzip it

tar -xzvf mysql-5.1.29-rc.tar.gz


(3) config, make and install (make sure you have Xcode installed already)


cd mysql-5.1.29-rc


scipt: Select all

CC=gcc CFLAGS="-O3 -fno-omit-frame-pointer" CXX=gcc CXXFLAGS="-O3 -fno-omit-frame-pointer \
-felide-constructors -fno-exceptions -fno-rtti" ./configure --prefix=/usr/local/mysql \
--with-extra-charsets=complex --enable-thread-safe-client --enable-local-infile \
--enable-shared --with-unix-socket-path=/var/mysql/mysql.sock \
--with-mysqld-user=mysql


make
sudo make install


(4) create database

sudo chgrp -R mysql /usr/local/mysql
cd /usr/local/mysql
sudo ./bin/mysql_install_db --user=mysql
sudo chown -R mysql ./var


(5) create unix-socket directory

sudo mkdir -p /var/mysql
sudo chown -R mysql /var/mysql


(6) create LaunchDaemons in /Library/LaunchDaemons/com.mysql.mysqld.plist so that it can autostart

sudo vi /Library/LaunchDaemons/com.mysql.mysqld.plist

and put this in the file

com.mysql.mysqld.plist: Select all


<?xml version="1.0" encoding="UTF-8"?>
<!DOCTYPE plist PUBLIC "-//Apple//DTD PLIST 1.0//EN" "http://www.apple.com/DTDs/PropertyList-1.0.dtd">
<plist version="1.0">
<dict>
<key>KeepAlive</key>
<true/>
<key>Label</key>
<string>com.mysql.mysqld</string>
<key>Program</key>
<string>/usr/local/mysql/bin/mysqld_safe</string>
<key>RunAtLoad</key>
<true/>
<key>UserName</key>
<string>mysql</string>
<key>WorkingDirectory</key>
<string>/usr/local/mysql</string>
</dict>
</plist>


(7) start mysql server and restart apache server

sudo launchctl load -w /Library/LaunchDaemons/com.mysql.mysqld.plist
sudo apachectl restart


and if you want to manually stop the mysql server

sudo launchctl unload -w /Library/LaunchDaemons/com.mysql.mysqld.plist


(8) create path in ~/.bash_login

vi ~/.bash_login

and put this

export PATH="/usr/local/mysql/bin:$PATH"


run this

. ~/.bash_login


(9) create root password with mypassword
mysqladmin -u root password mypassword

(10) create databse in mysql

mysql -u root -p
> CREATE DATABASE database_name DEFAULT CHARACTER SET utf8 COLLATE utf8_unicode_ci;
> GRANT ALL PRIVILEGES ON database_name.* TO username@localhost IDENTIFIED BY 'password';
> FLUSH PRIVILEGES;
> QUIT

Wednesday, November 5, 2008

[How-to] Install Ubuntu 8.1 in Virtual PC2007

Install Ubuntu in Virtual PC 2007 may have screen display problem (similar to Fedora) and fail during installation.

Here are the steps to successfully install Ubuntu in VPC2007 and this is the easiest method (as there are many tricks to do it in the past) that I discovered.

(1) Setup the new Virtual Machine in VPC 2007 and mount the iso image (ubuntu-8-1.10-desktop-i386.iso).

Please check the size and MD5 Sum to ensure the iso image is successfully downloaded.

MD5 (ubuntu-8-1.10-desktop-i386.iso) = 24ea1163ea6c9f5dae77de8c49ee7c03
ubuntu-8.10-desktop-i386.iso 699M

(2) Inside the Ubuntu Install Screen, first Press "F4" and Select "Safe Graphics mode"

(3) Then press down arrow and highlight the menu "Install Ubuntu". (highlight only and don't press Enter)

(4) Press "F6" to bring up the "Other Options"
Then type "vesa vga=771" at the end of the option line
Then Press "Enter", the installation will start instantly.

Note: If you want other resolution, you can try say vga=791 instead of vga=771

I did not try all these, some of them might not work. The codes are listed out for reference only.

vga=769 means 600x480 8 bits color
vga=785 means 600x480 16 bits color
vga=786 means 600x480 24 bits color
vga=771 means 800x600 8 bits color
vga=788 means 800x600 16 bits color
vga=789 means 800x600 24 bits color
vga=773 means 1024x768 8 bits color
vga=791 means 1024x768 16 bits color
vga=792 means 1024x768 24 bits color


(5) After installation, it will prompt to restart. But the restart might not work and you have to manually reset the VM in VPC 2007 as in step (6) below

(6) Then release the mounted iso image and in VPC 2007 menu to reset the VM in VPC 2007, that is, VPC menu choose -> Action -> Reset

(7) Enjoy using Ubuntu in VPC 2007, and you can start installing other packages / sdks for development following my other guides in this blog


(8) To solve the sound problem, start the Terminal in Ubuntu and type

sudoedit /etc/rc.local

At the end of the # lines, but before “exit 0″, type on a new line (again without quotes) “modprobe snd-sb16″
Ctrl + O to write out, enter to accept the name, Ctrl + X to close.

Monday, November 3, 2008

Personal Installation Guide for Ubuntu 8.10 in VMWare for iPhone / Android SDK development

(1) Download ubuntu-8-1.10-desktop-i386.iso (32 bit Intel i386 Desktop)
http://www.ubuntu.com/getubuntu/download
MD5 (ubuntu-8-1.10-desktop-i386.iso) = 24ea1163ea6c9f5dae77de8c49ee7c03

Installation is very easy just mount the iso image in the VMWare, and everything goes default. then install VMWare tools. If network does not work try command "sudo dhclient"

If you want to install Ubuntu 8.10 in Virtual PC 2007
see this guide
http://tungchingkai.blogspot.com/2008/11/how-to-install-ubuntu-81-in-virtual.html

(2) VMWare Settings : Harddisk Size 8G, Ram 512MB

(3) Purpose : sdk development on iPhone / Android
Allows samba mount, ssh / scp access
apache2 server with php5 support for sqlite3 db

(4) Add root access for useraccount without password (this does not work, I don't know why, so you still need password)
Ubuntu default root disabled, so you can disable password input by editing etc/sudoers
sudo visudo
Add this line (e.g. sdkuser is the default user account)
sdkuser ALL=(ALL) NOPASSWD:ALL

(5) install build essential packages so that you can compile llvm-gcc for iPhone toolchain SDK2.0

sudo apt-get update
sudo apt-get install build-essential bison flex


(6) install server packages so that you can have local webserver and ssh and samba server

sudo apt-get install apache2 php5 libapache2-mod-php5 php5-cli php5-common php5-cgi php5-sqlite openssh-server samba


Install php5-sqlite3
sudo apt-get install php-db php-pear
wget http://us.archive.ubuntu.com/ubuntu/pool/universe/p/php-sqlite3/php-sqlite3_0.5-1_i386.deb
sudo dpkg -i php-sqlite3_0.5-1_i386.deb


(7) Create Project folder for smb mount (guest login ok) so that you can use windows / smb mount the virtual machine folder

(assume sdkuser is the default user account)


mkdir -p /home/sdkuser/Projects
chmod 777 /home/sdkuser/Projects

sudoedit /etc/samba/smb.conf


and add the followings at the end

smb.conf: Select all

[Projects]
comment = Projects Folder Share
writable = yes
locking = no
path = /home/sdkuser/Projects
public = yes
browseable = yes
guest ok = yes
create mask = 0666
directory mask = 0777


Note : you have to restart samba server to make the new configuration effective
sudo /etc/init.d/samba restart

Update for Ubuntu 9 /10
You have to edit
sudo vi /etc/apt/sources.list
and uncomment these in order to install sun-java6-jdk
deb http://archive.canonical.com/ubuntu maverick partner
deb-src http://archive.canonical.com/ubuntu maverick partner


(8) install jdk6 so that you can compile Andriod app

sudo apt-get update
sudo apt-get install sun-java6-jdk


(9) Download Android SDK http://dl.google.com/android/android-sdk-linux_x86-1.0_r1.zip from http://code.google.com/android/download_list.html

install in ~/Android/

mkdir -p ~/Android/
sudo unzip ~/Desktop/android-sdk-linux_x86-1.0_r1.zip -d ~/Android/
sudo chown -R sdkuser:sdkuser ~/Andriod


Update for android-sdk 2.0 or above

mkdir -p ~/Android/
tar xzvf ~/Downloads/android-sdk_r12-linux_x86.tgz
~/Android/tools/android update sdk


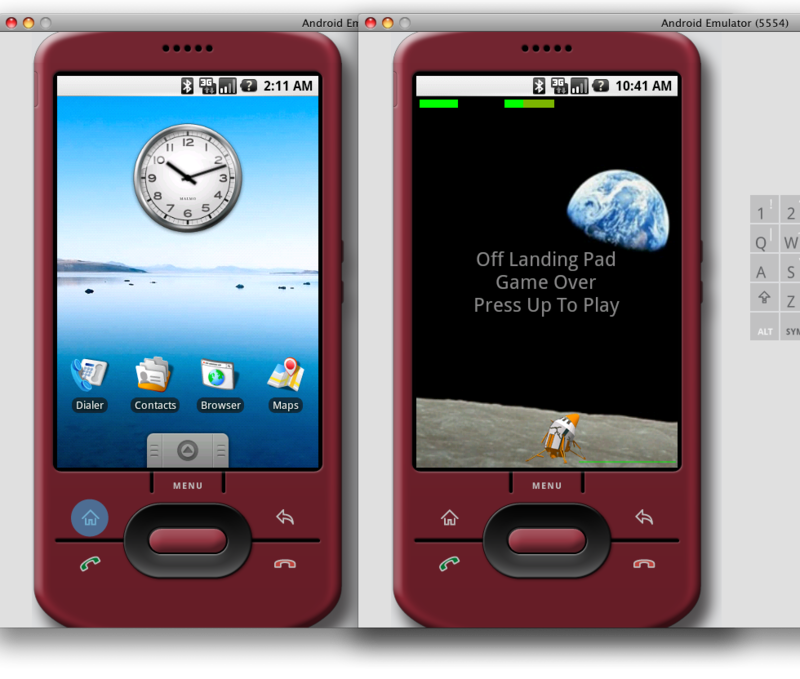
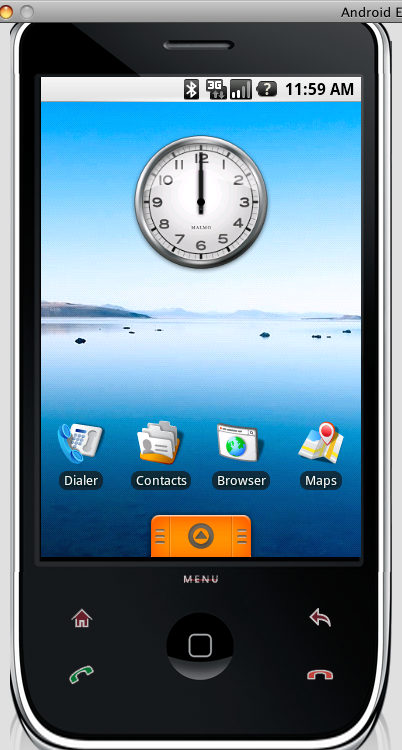
create sd card & test emulator

~/Android/android-sdk-linux_x86-1.0_r1/tools/mksdcard -l SD500M 500M ~/Android/sd500m.img

~/Android/android-sdk-linux_x86-1.0_r1/tools/emulator -datadir ~/Android -scale 0.7 -sdcard ~/Android/sd500m.img &


(10) Download and Install Eclipse 3.4.1 (you can't use the debian package eclipse which is 3.2 only)
from http://www.eclipse.org/downloads/
http://www.eclipse.org/downloads/download.php?file=/technology/epp/downloads/release/ganymede/SR1/eclipse-java-ganymede-SR1-linux-gtk.tar.gz

install in /usr/lib

cd /usr/lib; sudo tar -xzvf ~/Desktop/eclipse-java-ganymede-SR1-linux-gtk.tar.gz


Update for eclipse-java-helios
http://www.eclipse.org/downloads/packages/eclipse-ide-java-developers/heliossr2

mkdir -p ~/Android/
cd /usr/lib; sudo tar -xzvf ~/Downloads/eclipse-java-helios-SR2-linux-gtk.tar.gz


Add main menu & icon for eclipse in GNOME


sudoedit /usr/share/applications/eclipse.desktop


and save this

eclipse.desktop: Select all

[Desktop Entry]
Name=Eclipse
Comment=Develop applications in a variety of different programming languages
Exec=/usr/lib/eclipse/eclipse
Icon=eclipse48.png
Terminal=false
Type=Application
Categories=Development;
StartupNotify=true


There is no eclipse icon in the download file eclipse-java-ganymede-SR1-linux-gtk.tar.gz. You can get it from eclipse 3.2.2 package
and install it manually

download the eclipse 3.2.2 package
wget http://us.archive.ubuntu.com/ubuntu/pool/universe/e/eclipse/eclipse_3.2.2-5ubuntu2_i386.deb

extract the package and copy the icons to /usr/share/pixmaps/
dpkg -x eclipse_3.2.2-5ubuntu2_i386.deb tmp
sudo cp tmp/usr/share/pixmaps/* /usr/share/pixmaps/
rm -fr tmp


Install Android sdk plug-in for Eclipse
(based on http://code.google.com/android/intro/installing.html#installingplugin)
add this site and install in Eclipse
http://dl-ssl.google.com/android/eclipse/

Edit Eclipse's preference for Andriod (Window -> Preferences -> Android)

SDK location
/home/sdkuser/Android/android-sdk-linux_x86-1.0_r1/

emulator options
-scale 0.7 -sdcard /home/sdkuser/Android/sd500m.img

Test HelloActivity in Eclipse
(a) Create a New Android Project in Eclipse (File -> New -> Project... -> Android -> Android Project)
(b) Choose Create project from existing source and browse to ~/Android/android-sdk-linux_x86-1.0_r1/samples/HelloActivity
(c) Run HelloActivity as Android Application
(d) Then the emulator will start Hello, World! will be on the emulator screen

Note: Please don't set the workspace of Eclipse to the sample project folder
~/Android/android-sdk-linux_x86-1.0_r1/samples/
or else you will get error when importing project from existing source


Update for iphone toolchain4 for SDK4.x+
http://github.com/javacom/toolchain4
You need to install clang 2.7 or above in Ubuntu 8.10

wget http://archive.ubuntu.com/ubuntu/pool/universe/c/clang/clang_2.7-0ubuntu1_i386.deb
wget http://mirrors.us.kernel.org/ubuntu/pool/main/l/llvm-2.7/libllvm2.7_2.7-5ubuntu2_i386.deb
wget http://mirrors.us.kernel.org/ubuntu/pool/main/libf/libffi/libffi5_3.0.9-2ubuntu2_i386.deb


(11) Install iPhone llvm-gcc and toolchain SDK2.0
Refer to this article and download the file UpgradeToolChain2.tgz and build the llvm-gcc for iPhone
http://iphonesdkdev.blogspot.com/2008/10/how-to-install-llvm-gcc-for-iphone-sdk.html

Install ldid in Linux, so that you can fake codesign it

cd ~/Projects
wget http://svn.telesphoreo.org/trunk/data/ldid/ldid-1.0.476.tgz
tar -zxf ldid-1.0.476.tgz
cd ldid-1.0.476
g++ -I . -o util/ldid{,.cpp} -x c util/{lookup2,sha1}.c
sudo cp -a util/ldid /usr/bin


or here
wget http://www.telesphoreo.org/export/477/trunk/data/ldid/ldid-1.0.476.tgz

updated ldid source
wget http://svn.telesphoreo.org/trunk/data/ldid/ldid-1.0.610.tgz

Updates : If you compiled it in cgywin, you need to add (uint32_t) in the source code ldid.cpp that has ambiguous overload call error message like this

error: call of overloaded 'Swap(int)' is ambiguous


If you need to codesign the iPhone binary in Linux add this to your build script

export CODESIGN_ALLOCATE=/usr/toolchain2/pre/bin/arm-apple-darwin9-codesign_allocate; ldid -S $(PROJECTNAME)


(12) test apache2 and php so that you can see the php info page in the local webserver

In Firefox browser of Ubuntu enter this address
http://localhost/

enable php5 (sometimes you need this)
a2enmod php5

restart apache server
sudo /etc/init.d/apache2 restart

create this test.php script in /var/www

sudo chown -R sdkuser:sdkuser /var/www
echo "<?php phpinfo(); ?>" > /var/www/test.php


and see the php info in Firefox browser of Ubuntu
http://localhost/test.php

(13) create sqlite3 db
sqlite3 test.db: Select all


sudo chown -R sdkuser:sdkuser /var/www
cd /var/www
sqlite3 test.db
sqlite> create table test (id integer primary key, value text);
sqlite> insert into test (value) values('eenie');
sqlite>
sqlite> insert into test (value) values('meenie');
sqlite> insert into test (value) values('miny');
sqlite> insert into test (value) values('mo');
sqlite> select * from test;
sqlite>
sqlite> .exit


and test sqlite3 & php5-sqlite3 by using testdb.php script to test the access to sqlite3 db on webserver

(14) testdb.php
testdb.php: Select all


<// Version 0.01
<html>
<head><meta http-equiv="Content-Type" content="text-html; charset=UTF-8" /></head>
<title>iPhone Database</title>
<body>
<?php

$ip_dbpath[] = '/var/www/test.db';

// $ip_dbpath[] = '/var/www/sms.db';
// $ip_dbpath[] = '/var/www/call_history.db';
// $ip_dbpath[] = '/var/www/notes.db';
// $ip_dbpath[] = '/var/www/AddressBook.sqlitedb';
// $ip_dbpath[] = '/var/www/Calendar.sqlitedb';

// db location in iPhone /private/var/mobile/Library/SMS/sms.db
// db location in iPhone /private/var/mobile/Library/CallHistory/call_history.db
// db location in iPhone /private/var/mobile/Library/Notes/notes.db
// db location in iPhone /private/var/mobile/Library/AddressBook/AddressBook.sqlitedb
// db location in iPhone /private/var/mobile/Library/Calendar/Calendar.sqlitedb


$ip_dbdesc[] = 'test';

// $ip_dbdesc[] = 'SMS';
// $ip_dbdesc[] = 'Call History';
// $ip_dbdesc[] = 'Notes';
// $ip_dbdesc[] = 'Address Book';
// $ip_dbdesc[] = 'Calendar';

$ip_query[] = 'SELECT * from test order by 1';
// $ip_query[] = 'SELECT date, address, text FROM message order by 1 desc, 2;';
// $ip_query[] = 'SELECT date, address, duration FROM call order by 1 desc;';
// $ip_query[] = 'SELECT creation_date, data, title FROM Note inner join note_bodies on Note.ROWID = note_bodies.note_id order by 1;';
// $ip_query[] = 'SELECT First, Last, Middle, CreationDate, ModificationDate FROM ABPerson;';
// $ip_query[] = 'SELECT start_date, end_date, summary, location, description FROM Event order by 1, 2;';

// $dbcount = sizeof($ip_dbpath);
// if you uncomment the above db & query and add copy the iPhone db , you can list out the content of sqlitedb of iPhone
$dbcount = 1;

for ($dbnum=0;$dbnum<$dbcount;$dbnum++){

try {
$dbpath = $ip_dbpath[ $dbnum ];
$dbh = new PDO('sqlite:'.$dbpath);
$query = $ip_query[ $dbnum ];
$stmt = $dbh->prepare($query);
$stmt->execute();
}
catch (PDOException $e) {
die("Could not open database" . $e->getMessage());
}
$colcount = $stmt->columnCount();
echo "<h1>". $ip_dbdesc[ $dbnum ] . "</h1>";
echo "<table cellpadding=10 border=1>";

for ($i=0;$i<$colcount;$i++) {
$meta = $stmt->getColumnMeta($i);
echo "<td>".$meta["name"]."</td>";
}

while ($row = $stmt->fetch()) {
echo "<tr>";
for ($i=0;$i<$colcount;$i++) {
$meta = $stmt->getColumnMeta($i);
if ($meta["native_type"] == "null") {
echo "<td> </td>";
}
elseif (preg_match("/date$/i", $meta["name"])) {
echo "<td>". date("j M Y D g.i a", $row[$i])."</td>";
}
elseif (preg_match("/[call|sms]$/i", $meta["name"]) && $meta["name"] == "address" && strlen(rtrim($row[ $i])) == 8) {
echo "<td><A href='Tel:".$row[$i]."'>".$row[$i]."</A></td>";
}
else {
echo "<td>".$row[ $i]."</td>";
}
}
echo "</tr>";
}
echo "</table>";
}
?>
</body>
</html>


(15) Enjoy building app
Why to install apache2, php5 and php5-sqlite3 in Ubuntu ?

Because both iPhone and Andriod SDK use sqlite3 as database engine.
Webserver can be served for many purposes when testing including http get/post access and cydia repository as well.


Additional Notes
If you need to install flash plugin in firefox
sudo apt-get install flashplugin-nonfree

If you need to install java plugin in firefox
sudo apt-get install sun-java6-plugin

If you need to install xpdf
sudo apt-get install xpdf-reader

If you need to install jedit
sudo apt-get install jedit

If you want to install mysql, it will promot you to enter the root password of mysql during installation
sudo apt-get install mysql-server php5-mysql

use this to login mysql
mysql -u root -h localhost -p

To change sql root password from oldpassword to newpassword
mysqladmin -u root -poldpassword password newpassword

Create a new database (newsdb) and new user (newsuser) with password (newspassword)

mysql -u root -p
> CREATE DATABASE newsdb DEFAULT CHARACTER SET utf8 COLLATE utf8_unicode_ci;
> GRANT ALL PRIVILEGES ON newsdb.* TO newsuser@localhost IDENTIFIED BY 'newspassword';
> FLUSH PRIVILEGES;
> QUIT

Tuesday, October 7, 2008

HK On-line Radio Stations

Metro Plus 新城采訊台 AM104.4 (AM 1044)
mms://s1.104mfonline.com.hk/Encoder3

Metro Info 新城知訊台 (FM 99.7)
mms://s1.104mfonline.com.hk/Encoder4

Metro Finance 新城財經台 (FM 104)
mms://s1.104mfonline.com.hk/Encoder5

商業一台 雷霆881
mms://mslive05.881903.com/cr1

商業二台 叱吒903
mms://mslive05.881903.com/cr2

香港電台第一台
http://www.rthk.org.hk/live1.asx
mms://202.177.192.111/radio1

香港電台第二台
http://www.rthk.org.hk/live2.asx
mms://202.177.192.111/radio2

香港電台第三台
http://www.rthk.org.hk/live3.asx
mms://202.177.192.111/radio3

香港電台第四台
http://www.rthk.org.hk/live4.asx
mms://202.177.192.111/radio4

香港電台第五台
http://www.rthk.org.hk/live5.asx
mms://202.177.192.111/radio5

香港電台普通話台
http://www.rthk.org.hk/live6.asx
mms://202.177.192.111/ptc

澳門電台網上直播
mms://202.175.80.10/LiveAudio

DBC1 大聲台
http://58.64.197.165:8006/dbc1

DBC2 大家台
http://58.64.197.165:8002/dbc2

DBC3 大錢台
http://58.64.197.165:8006/dbc3

DBC4 大哂台
http://58.64.197.165:8006/dbc4

DBC5 Digital We
http://58.64.197.165:8005/dbc5

DBC6 大歌台
http://58.64.197.165:8006/dbc6

DBC7 大戲台
http://58.64.197.165:8006/dbc7
.
.
.

Monday, September 29, 2008

[How-To] Android emulator

(1) How to install emulator only (that is no JDK, Eclipse IDE or compiler)

(a) Download Android SDK from
http://code.google.com/android/download_list.html

The current version is
android-sdk-windows-1.0_r1.zip (windows)
android-sdk-linux_x86-1.0_r1.zip (linux)

unzip it and put the folder (android-sdk-windows-1.0_r1) to say under

Windows OS

D:\Android\


Linux / Mac OS X

~/Android/


(b) start the emulator in command windows (windows-R -> cmd) / (Linux/Mac OS X -> Terminal) for the first time to setup data directory

Windows OS

D:
cd D:\Android\android-sdk-windows-1.0_r1\tools
emulator -datadir D:\Android


Linux / Mac OS X

cd ~/Android/android-sdk-linux_x86-1.0_r1/tools
./emulator -datadir ~/Android


(2) How to create sdcard for emulator (e.g. 500M)
e.g. To create a sdcard image of 500M with filename sd500m.img

Windows OS

D:
cd D:\Android\android-sdk-windows-1.0_r1\tools
mksdcard -l SD500M 500M D:\Android\sd500m.img


Linux / Mac OS X

cd ~/Android/android-sdk-linux_x86-1.0_r1/tools
./mksdcard -l SD500M 500M ~/Android/sd500m.img


when starting the emulator and adding -sdcard option
Windows OS

D:
cd D:\Android\android-sdk-windows-1.0_r1\tools
emulator -sdcard D:\Android\sd500m.img [.... other options]


Linux / Mac OS X

cd ~/Android/android-sdk-linux_x86-1.0_r1/tools
./emulator -sdcard ~/Android/sd500m.img [.... other options]


(3) How to scale the emulator size when the emulator screen is out of view of your computer

when starting the emulator and adding -scale option (range from 0.1 to 3)

e.g. start the emulator with a scale of 0.5
Windows OS

D:
cd D:\Android\android-sdk-windows-1.0_r1\tools
emulator -scale 0.5 [.... other options]


Linux / Mac OS X

cd ~/Android/android-sdk-linux_x86-1.0_r1/tools
./emulator -scale 0.5 [.... other options]


(4) How to copy Musics and Pictures to the sdcard image for Android emulator

The sdcard image is a FAT32 image. You just double click the file in Mac OSX to mount it.
Inside it, create folders called Musics and Pictures and put your mp3 files and pictures as per screen dump below

(5) How to copy files to sdcard while the emulator is running or when you cannot mount it.

You can mount the sdcard image while the emulator is running, but sometimes you want to copy files to the sdcard in command line mode run this

Make Sure that the emulator is running
Windows OS

D:
cd D:\Android\android-sdk-windows-1.0_r1\tools
adb push mynotebookphoto.png sdcard/Pictures/


Linux / Mac OS X

cd ~/Android/android-sdk-linux_x86-1.0_r1/tools
./adb push mynotebookphoto.png sdcard/Pictures/


However, the emulator will need to restart so that it can acknowledge the new file. This is currently the limitation of the emulator

when copying back from emulator sdcard to local file
Windows OS

D:
cd D:\Android\android-sdk-windows-1.0_r1\tools
adb pull sdcard/Pictures/image01.jpg images01_fromsdcard.jpg


Linux / Mac OS X

cd ~/Android/android-sdk-linux_x86-1.0_r1/tools
./adb pull sdcard/Pictures/image01.jpg images01_fromsdcard.jpg


(6) How to get shell access to emulator
The emulator must be running, and run this
Windows OS

D:
cd D:\Android\android-sdk-windows-1.0_r1\tools
adb shell


Linux / Mac OS X

cd ~/Android/android-sdk-linux_x86-1.0_r1/tools
./adb shell


(7) How to add path of the emulator tools directory to Windows OS, so as no need to change directory to sdk directory
On Windows, right click on My Computer, and select Properties. Under the Advanced tab, hit the Environment Variables button, and in the dialog that comes up, double-click on Path under System Variables and add this to end of the text
Windows OS

D:\Android\android-sdk-windows-1.0_r1\tools;


Please take note that you have to restart the command window for the path to become effective

(8) How to change skin for the emulator
You can download some iPhone skins for Android emulator here

http://www.anddev.org/emulator_iphone_skin_-_qvga-hvga_landscape-portrait-t109.html

(9) How to change wallpaper, add new icons to homescreen and move/delete icons.

At Home Screen, press Menu

+ Add -> for adding icons to home screen
Wallpaper -> to change wallpaper

You can flip the homescreen to left and right and add icons there

To delete the icon just click and hold the button and a trash will appear above the menu button then you can drag the icon to the trash and delete it

To move the icon, click and hold the icon and then drag to new position.

Saturday, September 27, 2008

[How-to] Install Android SDK on Asus eeepc Linux

Asus eeepc comes with xandros Debian Linux version but does not have development tools. This guide shows you how to setup the development tools for Android SDK.

Part (A) You need to add the debian package source and install the compiling tools and JDK from Sun in eee pc Linux

(1) Launch Terminal (Ctrl-Alt-T)

(2) edit the file/etc/apt/sources.list
sudo vi /etc/apt/sources.list

and add this line to the end of the file "sources.list"
deb http://http.us.debian.org/debian/ stable main

(3) Run these commands in Terminal to install building tools

sudo apt-get update
sudo apt-get upgrade
sudo apt-get install build-essential ant


(4) Download JDK from Sun
(Latest Release)
http://java.sun.com/javase/downloads/index.jsp

The current version of JDK is
Java SE Development Kit 6u7
Download the Linux version and the file without rpm. That is

jdk-6u7-linux-i586.bin

(5) Run these commands in Terminal to install JDK


chmod +x jdk-6u7-linux-i586.bin
./jdk-6u7-linux-i586.bin

#then follow the install instructions and answer yes and then a directory jdk1.6.0_07 will be created

sudo mv jdk1.6.0_07 /usr/
cd /usr/bin
sudo ln -sf /usr/jdk1.6.0_07/bin/java
sudo ln -sf /usr/jdk1.6.0_07/bin/javac
sudo ln -sf /usr/jdk1.6.0_07/bin/jar


Part (B) Download and Install Android SDK

(1) Download the Android SDK
http://code.google.com/android/download.html

download the Linux version, the current version is
Linux (i386) android-sdk-linux_x86-1.0_r1.zip

(2) unzip and install the android SDK say to /usr/

unzip android-sdk-linux_x86-1.0_r1.zip
sudo mv android-sdk-linux_x86-1.0_r1 /usr/


(3) edit ~/.bash_profile
vi ~/.bash_profile
change
PATH=~/bin:"${PATH}"
to
PATH=~/bin:/usr/android-sdk-linux_x86-1.0_r1/tools:"${PATH}"

(4) Test run Android emulator

starting emulator in portrait mode will be out of view in eeepc, so we need to run it in landscape mode. Moreover the sound does not work.
To start the emuator for the first time, use these commands in Terminal

Assume, Android SDK is installed in /usr and android data will be kept at ~/androiddata


export PATH=${PATH}:/usr/android-sdk-linux_x86-1.0_r1/tools
mkdir -p ~/androiddata
emulator -datadir ~/androiddata -noaudio -skin HVGA-L


or, alternatively, if you have to run the emulator in portrait mode, you need to scale it say by 0.6

emulator -datadir ~/androiddata -noaudio -scale 0.6


Please be patient for the Emulator for the first time as it takes very long to create the data on first installation


Part (C) Test building HelloActivity from the sample code

(1) If you have installed the Andriod SDK and started the emulator for the first time, it is better to reboot the computer first and then start the emulator again.

(2) Create the Projects directory say
mkdir -p ~/Projects

(3) start emulator in Terminal
emulator -noaudio -skin HVGA-L &

(4) copy the HelloActivity from sample of SDK to Projects directory
cp -r /usr/android-sdk-linux_x86-1.0_r1/samples/HelloActivity ~/Projects/

(5) Use activityCreator to create the build file
activitycreator --out ~/Projects/HelloActivity com.example.android.helloactivity

(6) Build the HelloActivity project
cd ~/Projects/
ant


(7) Install the HelloActivity project to emulator
cd ~/Projects/
ant install


Remember, you must start the emulator before installing binary

(8) Then you can test the installed program HelloActivity in the emulator
To uninstall the program do this in Terminal
cd ~/Projects/
ant uninstall


If you need an integrated development environment, use Eclipse and install the plug-ins as described in the Android download site.

If you amend some codes in the Project and want to reinstall use

cd ~/Projects/
ant reinstall


For Mac OS X installation, just skip the Part (A) of this guide and follow similar procedure in other parts, as Mac OS X has these building tools / JDK already installed.

For other sample projects from SDK the activityCreate scripts are
cp -r /usr/android-sdk-linux_x86-1.0_r1/samples/LunarLander ~/Projects/
activitycreator --out ~/Projects/LunarLander com.example.android.lunarlander
cd ~/Projects/LunarLander
ant install

cp -r /usr/android-sdk-linux_x86-1.0_r1/samples/NotePad ~/Projects/
activitycreator --out ~/Projects/NotePad com.example.android.notepad
cd ~/Projects/NotePad
ant install

cp -r /usr/android-sdk-linux_x86-1.0_r1/samples/Snake ~/Projects/
activitycreator --out ~/Projects/Snake com.example.android.snake
cd ~/Projects/Snake
ant install


Enjoy.

Wednesday, September 24, 2008

Android SDK

Really good looking on my Mac


Wednesday, September 17, 2008

Recent apps on your dock for Mac

http://www.tuaw.com/2008/09/16/terminal-tips-add-recent-applications-as-a-stack-on-dock/

Type this in Mac Terminal

defaults write com.apple.dock persistent-others -array-add '{ "tile-data" = { "list-type" = 1; }; "tile-type" = "recents-tile"; }'
killall Dock

Monday, September 8, 2008

How do you create an .ipa file?

This is taken from discussion forum and I found it very useful

What you need:
1: An app
2: A patched MobileInstallation file installed on your iPhone or iPod Touch.
3: Lastly, you need to know that when I say "ProgName", substitute the name of the program you're working with
Getting the iTunesArtwork file
The iTunesArtwork file is simply a jpeg image with the extension taken off, and is included in application's install folder on your device for every app downloaded from the app store. This image is what appears in the Applications section of iTunes as the icon for the app, and is definitely nice to have -- if you don't have it, you get a generic, black icon that no one wants to see. If you have the iTunesArtwork file, skip all this and go down to the next red headline! Otherwise, read on:
1: Open iTunes on your computer and find your application in the iTunes Music Store. On the application's page, find the app icon at the top-left corner of the page and right-click it. Now choose "Copy iTunes Store URL". Your clipboard now contains something like this:
Code:
http://phobos.apple.com/WebObjects/MZStore.woa/wa/viewSoftware?id=284962368&mt=8

2. run this script (which I created) in mac, eg ./getappicon.sh 284962368
Shell script: getappicon.shSelect all

#!/bin/sh
url=`curl -s -L "http://ax.phobos.apple.com.edgesuite.net/WebObjects/MZStore.woa/wa/viewSoftware?id={$1}&mt=8" | gunzip | grep '100x100-75.jpg' | cut -f22 -d"\""`
appname=`curl -s -L "http://ax.phobos.apple.com.edgesuite.net/WebObjects/MZStore.woa/wa/viewSoftware?id={$1}&mt=8" | gunzip | grep '100x100-75.jpg' | cut -f16 -d"\""`
if [ "$appname" = "0" ] ; then
appname=`curl -s -L "http://ax.phobos.apple.com.edgesuite.net/WebObjects/MZStore.woa/wa/viewSoftware?id={$1}&mt=8" | gunzip | grep '100x100-75.jpg' | cut -f18 -d"\""`
fi
echo ${appname}

url100=${url}
curl ${url100} > ${1}.jpg

url512=`echo ${url100} | perl -pe 's/100/512/g'`
curl ${url512} > ${1}_512.jpg


3: Then you will get two jpg files, 284962368_512.jpg & 284962368.jpg Rename the 512 jpeg to iTunesArtwork. You've just gotten your iTunesArtwork file.

Bundling the .IPA
1: Create a folder on your desktop called "working". Open that, and create another folder inside of it called "Payload". Case-sensitive.
2: Move your iTunesArtwork file into the "working" folder, and your .app into the Payload folder.
3: Mac and Linux users only: Open Terminal and run the following command:
Code:
chmod -R 775 ~/Desktop/working/Payload
4: Go into your ProgName.app folder within Payload (Mac users, right-click ProgName.app and choose Show Package Contents).
5 (For Mac users with Dev Tools installed ONLY): Double-click the Info.plist file. The Property List Editor will open and show a simple table. Click the last row of the table, then press the + button that appears to create a new row at the bottom. In the first new cell enter
Code:
SignerIdentity
and in the second new cell, enter
Code:
Apple iPhone OS Application Signing
Save this file.
5 (For Windows, Linux, and other Macs): Visit the following site: https://brokolice.drsny.net/iphone/plutil/ (You may have to Approve the security certificate -- don't worry, it's safe)
Browse for your Info.plist file, and press the "Convert" button. Save the resulting file to your computer. Windows users, open this file in WordPad. Mac and Linux users can use any text editor.
scroll to the bottom of the file and make a new line just before
Code:
</dict>
And paste the following in that spot:
Code:
<key>SignerIdentity</key>
<string>Apple iPhone OS Application Signing</string>
The end of the file should now look like this:
Code:
<key>SignerIdentity</key>
<string>Apple iPhone OS Application Signing</string>
</dict>
</plist>
Save the file (Make sure the name is Info.plist -- case sensitive!) and replace the Info.plist in ProgName.app with it.
6: Time to zip it up. Use your favorite method to zip the iTunesArtwork file and Payload folder together in one .zip file. Mac users can select both, right-click, and choose "Compress 2 Items". Windows users can select both, right-click, and choose "Add to Archive" (remember to select ZIP, not RAR if that option is available).
If you unzip the file, you should see this structure:
Code:

iTunesArtwork
+Payload
AppName.app
7: Rename the zip file to ProgName.ipa
8: All done! Congratulations!

Friday, August 22, 2008

iPhone / iPod Firmware Link

http://ax.phobos.apple.com.edgesuite.net/WebObjects/MZStore.woa/wa/com.apple.jingle.appserver.client.MZITunesClientCheck/version?touchUpdate=true

Shell script: Select all

#!/bin/sh
curl -s -L http://ax.phobos.apple.com.edgesuite.net/WebObjects/MZStore.woa/wa/com.apple.jingle.appserver.client.MZITunesClientCheck/version?touchUpdate=true | gunzip | grep appldnld | grep "iP*.*Restore" | awk '{print $1;}' | uniq

Wednesday, August 20, 2008

Installer Script Command

http://www.hackint0sh.org/forum/showpost.php?p=335937&postcount=2

Common Script Commands of Installer
These are old script commands for Installer, I think some of them are still applicable in Installer 4

CopyPath() and RemovePath()
Code: Select all

<array>
<string>CopyPath</string>
<string>YourProg.app/</string>
<string>/Applications/YourProg.app</string>
</array>


and
Code: Select all

<array>
<string>RemovePath</string>
<string>/Applications/YourProg.app</string>
<string>/var/mobile/Library/Preferences/com.yourcompany.YourProg.plist</string>
</array>


Other Common Commands
AbortOperation(string) This will make Installer both abort the install process and displays a message telling the user why
Confirm(string,string,string) Confirm an action.
Exec(terminalCommand) Runs a Terminal command. Useful for things like chmod, chown, etc.
ExecNoError(terminalCommand) Runs a Terminal command.
LinkPath(oldPath, newPath) Links the two paths.
MovePath(oldPath, newPath) Moves files from one location to another
Notice(string) Displays a pop message while Installing
SetStatus(string) Sets the status of the install process. Useful for lengthy installs.

Example
Code: Select all

<array>
<string>Confirm</string>
<string>Changing Permission. Do you wish to continue?</string>
<string>Yes</string>
<string>No</string>
</array>
<array>
<string>SetStatus</string>
<string>Changing Permissions</string>
</array>
<array>
<string>Exec</string>
<string>/bin/chmod -R 755 /var/mobile/Media/MyProgData</string>
</array>
<array>
<string>Exec</string>
<string>/usr/bin/chown -R mobile /var/mobile/Media/MyProgData/.</string>
</array>
<array>
<string>Notice</string>
<string>Installation Completed. Please restart iPhone.</string>
</array>


If / IfNot
If(condition[array], action[array]) Use this to check for specific conditions and have Installer react accordingly. Example
Code: Select all

<array>
<string>IfNot</string>
<array>
<array>
<string>InstalledPackage</string>
<string>com.anothercompany.anotherprog</string>
</array>
</array>
<array>
<array>
<string>AbortOperation</string>
<string>You must install another package first.</string>
</array>
</array>
</array>


Some common things to check with If / IfNot
InstalledPackage(bundleIdentifier) Checks to see whether or not an application is installed.
ExistsPath(path) Checks to see whether a specific file or directory exists
FirmwareVersionIs(arrayOfFirmwaresTocheck) Checks the firmware version

Sunday, June 8, 2008

New blog

Just created a new blog about iPhone software development
http://iphonesdkdev.blogspot.com/

Friday, May 30, 2008

Remove and reenter the Mac Office 2008 product key

This is needed after you have installed Mac Office 2008 SP1

Remove and reenter the Mac Office 2008 product key
If your copy of Office 2008 was installed with an invalid product key, or if you mistakenly used the same product key to install Office 2008 on more than one computer, you must remove the invalid product key and enter a valid product key to use Office 2008.

(1) In the Finder, select /Applications/Microsoft Office 2008/Office/OfficePID.plist
, and then on the File menu, click Move to Trash.

(2) Select /Users/yourusername/Library/Preferences/Microsoft/Office 2008/Microsoft Office 2008 settings.plist
, and then on the File menu, click Move to Trash.

(3) On the Apple menu, click Restart.

(4) After your computer restarts, open any Office 2008 application.

(5) The Office Setup Assistant opens.

(6) Accept the software license agreement, and then enter your valid product key.


Sunday, May 25, 2008

Mac OS X Leopard runs IE6 (Active X) natively

You don't need VMWare, bootcamp nor Parellel Desktop. And it is free. You can run IE6 with Active X support in Mac OS X under X11

see this instruction

http://www.kronenberg.org/ies4osx/

If you need to install additional fonts, put them here

Internet Explorer 6.0.app/Contents/Resources/ie6/drive_c/windows/Fonts

I use these commands to install Chinese Font inside

cd Desktop/Internet Explorer 6.0.app/Contents/Resources/ie6/drive_c/windows/Fonts
ln -s /System/Library/Fonts/儷黑\ Pro.ttf .


Saturday, May 24, 2008

iPhone Open Toolchain Header runs UIShowCase

The missing UIKit clasees of open toolchain headers for IPhone SDK is now partially solved. You can now build UIShowCase in your Open Toolchain Template in iPhone SDK.

Read this
http://www.hackint0sh.org/forum/showpost.php?p=297245&postcount=15

Wednesday, May 14, 2008

What is needed to be an iPhone programmer (firmware 2.0 OS)

Even if you are not a registered iPhone developer of Apple (US$99 program), you still can code and test your iPhone program in firmware 2.0

This is how:

(1) You need a machine running Mac OS X 10.5.2 with Intel CPU because you need to run iPhone SDK for the iPhone OS 2.0
there are several possibilities, e.g.
(a) you can get a Intel Mac with Mac OS X 10.5.2 (which I think is the easiest one and save a lot of troubles, thus you can put omore time in the learning of iPhone programming)
(b) Use the VMWare image (and use VMWare Workstation/Player for PC), read this, and install iPhone SDK in it. You need C2D Intel CPU and lots of RAM (2G) in your existing PC.
(c) Install OSX86 on PC (you must be a power user), read this forum on how http://www.hackint0sh.org/forum/forumdisplay.php?f=104

(2) Get the iPhone SDK from Apple which is free after registration with Apple.

(3) You need to read some books on Objective C and Foundation framework of Mac OS X, I think Oreilly has good source of books in this subject. This site also gives some tutorial exmaples on cocoa programming http://cocoadevcentral.com/

(4) Get a pwned iPhone with iPhone OS 2.0 firmware beta 3 (build 5A240d)
read this for the pwnage tools http://www.hackint0sh.org/forum/forumdisplay.php?f=146

(5) Read this Forum and use the Xcode template (open toolchain header) here to start some coding and testing on iPhone
http://www.hackint0sh.org/forum/showthread.php?t=38389

(6) get some project code (based on open toolchain) from the right menu of this blog to compile and test run on iPhone

(7) start coding your own idea in your own iPhone project.

Saturday, May 10, 2008

Rainbow screen of death

class-dump for iPhone SDK header file

http://iphone.freecoder.org/classdump_en.html

with this wonderful tool, you don't need to worry about header files problem any more
e.g.
put the class-dump binary (Mac OS X) in your bin and do this

class-dump -H /Developer/Platforms/iPhoneSimulator.platform/Developer/SDKs/iPhoneSimulator2.0.sdk/System/Library/Frameworks/UIKit.framework/UIKit

you will get the most updated header files in your current directory from the SDK

Tuesday, May 6, 2008

Two versions of Hello World (SDK headers vs Open Tool Chain headers)

It is possible to use Open Tool Chain Header with the SDK and the iPhone OS 2.0 SDK headers, this example gives these two version to compare

iPhone OS 2.0 SDK headers version
Code: Select all

//
// main.m
// HelloSDK
//
#import <UIKit/UIKit.h>
@interface MyView : UIView {
}
@end
@implementation MyView
- (void)drawRect:(CGRect)rect {
[[UIColor whiteColor] set];
[@"Hello SDK" drawInRect:CGRectMake(0, 100, 320, 50)
withFont:[UIFont fontWithName:@"Marker Felt" size:50]
lineBreakMode:UILineBreakModeMiddleTruncation
alignment:UITextAlignmentCenter];
}
@end

@interface HelloSDK2AppDelegate : NSObject {
UIWindow *window;
MyView *contentView;
}
@property (nonatomic, retain) UIWindow *window;
@property (nonatomic, retain) MyView *contentView;
@end

@implementation HelloSDK2AppDelegate
@synthesize window;
@synthesize contentView;

- (void)applicationDidFinishLaunching:(UIApplication *)application {
// Create window
self.window = [[[UIWindow alloc] initWithFrame:[[UIScreen mainScreen] bounds]] autorelease];

// Set up content view
self.contentView = [[[MyView alloc] initWithFrame:[[UIScreen mainScreen] applicationFrame]] autorelease];
[window addSubview:contentView];

// Show window
[window makeKeyAndVisible];
}

- (void)dealloc {
[contentView release];
[window release];
[super dealloc];
}
@end

int main(int argc, char *argv[])
{
NSAutoreleasePool * pool = [[NSAutoreleasePool alloc] init];
int retVal = UIApplicationMain(argc, argv, nil, @"HelloSDK2AppDelegate");
[pool release];
return retVal;
}


Open Tool Chain headers version
Code: Select all

/*
HelloToolChain.app
main.m
*/

#import <Foundation/Foundation.h>
#import <UIKit/UIKit.h>

// include for the sdk compiler and open toolchain headers
#ifndef UIKIT_UIFont_UIColor_H
#define UIKIT_UIFont_UIColor_H
typedef float CGFloat;
#import <UIKit/UIFont.h>
#import <UIKit/UIColor.h>
#endif

@interface HelloToolChain : UIApplication
{
}
@end

@implementation HelloToolChain
- (void) applicationDidFinishLaunching: (NSNotification *)aNotification
{
UIWindow *window = [[UIWindow alloc] initWithContentRect: [UIHardware fullScreenApplicationContentRect]];
UITextLabel *label = [[UITextLabel alloc] initWithFrame: CGRectMake(0, 100, 320, 50)];
[label setFont:[UIFont fontWithName:@"Marker Felt" size:50]];
[label setCentersHorizontally: YES];
[label setText:@"Hello ToolChain"];
[label setBackgroundColor:[UIColor blackColor]];
[label setColor:[UIColor whiteColor]];
UIView *mainView = [[UIView alloc] initWithFrame: [UIHardware fullScreenApplicationContentRect]];
[mainView addSubview: label];
[mainView becomeFirstResponder];
[window orderFront: self];
[window makeKeyAndVisible];
[window setContentView: mainView];
}
@end

int main(int argc, char *argv[]) {
int returnCode;
NSAutoreleasePool *pool = [[NSAutoreleasePool alloc] init];
returnCode = UIApplicationMain(argc, argv, [HelloToolChain class]);
[pool release];
return returnCode;
}

Monday, May 5, 2008

iPhone1,1_2.0_5A258f_Restore.ipsw decrypt method

Steps to decrypt the iPhone firmware 2.0 beta 4 (build 5A258f) and extract the files from ramdisk and rootfs
1. Decompress firmware (using unzip command)
2. Decrypt ramdisk (using dd command)
3. Extract rootfs decryption key (using strings command)
4. Decrypt rootfs (using vfdecrypt utility)
5. Extract important files (for Mac just double click the decrypted dmg file, for windows use PowerISO to open)

$ md5 iPhone1,1_2.0_5A258f_Restore.ipsw
MD5 (iPhone1,1_2.0_5A258f_Restore.ipsw) = f7a2937c32615545ba339c330356d9ad


Run these commands to get the ramdisk of iPhone firmware 2.0 beta 4 (build 5A258f)
$ unzip -o iPhone1,1_2.0_5A258f_Restore.ipsw 018-3587-8.dmg
$ echo `hexdump -s12 -n4 -e '"%d\n"' 018-3587-8.dmg ` / 32 | bc

The output is 610816 which will be used for the next command

strip off the first 32 bytes (0x20) and remove the trailing certificate information
$ dd if=018-3587-8.dmg of=018-3587-8.ramdisk.dmg bs=32 skip=1 count=610816 conv=sync


The baseband is in the following folder of the converted ramdisk (018-3587-8.ramdisk.dmg) mounted image
/Volumes/ramdisk/usr/local/standalone/firmware

Run these commands to get the decrypt key of iPhone firmware 2.0 beta 4 (build 5A258f)
$ unzip -o iPhone1,1_2.0_5A258f_Restore.ipsw 018-3587-8.dmg
$ strings 018-3587-8.dmg | egrep "^[0-9a-fA-F]{72}$"


The decrypt key is
198d6602ba2ad2d427adf7058045fff5f20d05846622c186cca3d423ad03b5bc3f43c61c


Run these commands to decrypt the rootfs of iPhone firmware 2.0 beta 4 (build 5A258f)
$ unzip -o iPhone1,1_2.0_5A258f_Restore.ipsw 018-3585-6.dmg

$ ./vfdecrypt -i 018-3585-6.dmg -o decrypted20b4.dmg -k 198d6602ba2ad2d427adf7058045fff5f20d05846622c186cca3d423ad03b5bc3f43c61c


For Mac OS, you need this (universal binary for PPC and Intel)
http://rapidshare.com/files/40981513/vfdecrypt.zip.html

For windows OS, you need these
http://rapidshare.com/files/41004473/vfdecrypt.exe.html
http://pecl4win.php.net/download.php/dll/061dae89b309a98382dedc04942bd8a2/libeay32.dll
http://www.poweriso.com/

Here is the shell script to implement the above procedure and support the previous 8900 decrypt method in Mac OS X

#!/bin/sh
#v0.3
if [ $# -lt 1 ]
then
echo "usage : $0 iPhone1,1_2.0_5A274d_Restore.ipsw"
exit 0
else
IPSWNAMES=$@
fi
DDONE=0
for IPSWNAME in $IPSWNAMES
do
if [ -f "$IPSWNAME" ]
then
PWD=`pwd`
rm -f Restore.plist
unzip -o $IPSWNAME Restore.plist > /dev/null 2>/dev/null
if [ -f Restore.plist ]; then
DEVICECLASS=`defaults read $PWD/Restore DeviceClass`
PRODUCTVERSION=`defaults read $PWD/Restore ProductVersion`
BUILDVERSION=`defaults read $PWD/Restore ProductBuildVersion`
RESTORERAMDISK=`defaults read $PWD/Restore RestoreRamDisks | awk '/User/ { split($0, line, "\""); printf("%s\n", line[2]); }'`
SYSTEMRESTOREIMAGE=`defaults read $PWD/Restore SystemRestoreImages | awk '/User/ { split($0, line, "\""); printf("%s\n", line[2]); }'`
unzip -o $IPSWNAME $RESTORERAMDISK > /dev/null 2>/dev/null
FILEFORMAT=`hexdump -n4 -e '"%c%c%c%c\n"' $RESTORERAMDISK`
if [ "$FILEFORMAT" == "8900" ]
then
DECRYPTKEY=`strings $RESTORERAMDISK | egrep "^[0-9a-fA-F]{72}\$"`
if [ "$DECRYPTKEY" == "" ]; then
RAMDISKLENGTH=`hexdump -s12 -n4 -e '"%d\n"' $RESTORERAMDISK`
RAMDISKCOUNT=`echo $RAMDISKLENGTH / 512 | bc`
dd if=$RESTORERAMDISK of=$DEVICECLASS$PRODUCTVERSION$BUILDVERSION.stripped.dmg bs=512 skip=4 count=$RAMDISKCOUNT conv=sync > /dev/null 2>/dev/null
openssl enc -d -in $DEVICECLASS$PRODUCTVERSION$BUILDVERSION.stripped.dmg -out $DEVICECLASS$PRODUCTVERSION$BUILDVERSION.ramdisk.dmg -aes-128-cbc -K 188458A6D15034DFE386F23B61D43774 -iv 0 > /dev/null 2>/dev/null
rm -f $DEVICECLASS$PRODUCTVERSION$BUILDVERSION.stripped.dmg
else
dd if=$RESTORERAMDISK of=$DEVICECLASS$PRODUCTVERSION$BUILDVERSION.ramdisk.dmg bs=512 skip=4 conv=sync > /dev/null 2>/dev/null
fi
else
RAMDISKLENGTH=`hexdump -s12 -n4 -e '"%d\n"' $RESTORERAMDISK`
RAMDISKCOUNT=`echo $RAMDISKLENGTH / 32 | bc`
dd if=$RESTORERAMDISK of=$DEVICECLASS$PRODUCTVERSION$BUILDVERSION.ramdisk.dmg bs=32 skip=1 count=$RAMDISKCOUNT conv=sync > /dev/null 2>/dev/null
fi
rm -f $RESTORERAMDISK
DECRYPTKEY=`strings $DEVICECLASS$PRODUCTVERSION$BUILDVERSION.ramdisk.dmg | egrep "^[0-9a-fA-F]{72}\$"`
if [ "$DECRYPTKEY" == "" ]; then
echo "Decrypt failed : $IPSWNAME"
else
unzip -o $IPSWNAME $SYSTEMRESTOREIMAGE > /dev/null 2>/dev/null
./vfdecrypt -i $SYSTEMRESTOREIMAGE -o $DEVICECLASS$PRODUCTVERSION$BUILDVERSION.decrypted.dmg -k $DECRYPTKEY > /dev/null 2>/dev/null
rm -f $SYSTEMRESTOREIMAGE
echo
md5 $IPSWNAME
echo "RAMDISK = $DEVICECLASS$PRODUCTVERSION$BUILDVERSION.ramdisk.dmg"
echo "FILESYSTEM = $DEVICECLASS$PRODUCTVERSION$BUILDVERSION.decrypted.dmg"
echo "DECRYPTKEY = $DECRYPTKEY"
DDONE=1
fi
else
echo "Invalid ipsw file $IPSWNAME"
fi
else
echo "$IPSWNAME NOT FOUND"
fi
done
if [ "$DDONE" == "1" ]; then
echo "Job Completed!!!"
fi


If you find this info useful, please consider to $1 by clicking the Donate button.

iPhone PNG collections

see here http://cocoatouchdev.com/iphone-png-collection-t27.html

and here http://cocoatouchdev.com/iphone-2-0-applications-png-collection-t28.html

Xcode workspace

In order to use the Xcode workspace more efficiently, these are the additional guides as most of the times, a programmer will work on the text/code editor

(1) Use the View -> Zoom Editor in
when you select a source file e.g. main.m

(2) Use split button (grey square on the right) to create text/code editor window to create additional text/code editor view
when you are editing the source file

(3) Use pragma marks in your code, so that you can jump quickly to your code in the text/code editor window using the navigation bar
e.g.

#pragma mark -
#pragma mark PreferencesTable Datasource Methods
// MARK:
// TODO:
// FIXME:
// !!!:
// ???:


(4) Highlight the identifier and press "command+ double click" to jump definition

(5) use shortcut key "esc" for code completion

(6) View -> Text -> Wrap Lines

(7) Use code folding in text/code editor

Please goto Help -> Xcode workspace guide in Xcode environment for details on how to perform these functions

Saturday, April 19, 2008

My First iPhone firmware 2.0 application Embark

I have written a small application for firmware 2.0 beta 3 iPhone using the open tool chain header

This small application allows you to have place shortcut icon in homescreen for
telephone dial, sms, email or webpage


Requirements :
PWNED iPhone with firmware 2.0 beta 3 (build 5A240d)
SSH installed in your iPhone, so that you can install it via wifi

Details see this post
http://www.iphone.org.hk/cgi-bin/ch/topic_show.cgi?id=6264&h=1#27987

Application Binary can be downloaded from here

Friday, April 18, 2008

Using the Apple SDK with low-level toolchain APIs

Update and details here

Assume you have installed iPhone SDK beta 3 and want to use the toolchain APIs to port the existing iPhone Application to Firmware 2.0 beta 3 using Apple's SDK

(1) Install iPhone SDK beta 3 from Apple

(2) Install the toolchain headers as per instructions from here
But I have modified it for the Beta 3 SDK path as below


$ sudo mkdir -p /Developer/SDKs/iPhoneOS.sdk/Versions/iPhoneOS2.0.sdk/
$ svn co http://iphone-dev.googlecode.com/svn/branches/include-1.2-sdk
$ cd include-1.2-sdk
$ ./configure --prefix=/Developer/SDKs/iPhoneOS.sdk/Versions/iPhoneOS2.0.sdk/
$ sudo sh install-headers.sh


(3) Get the following Template here, unzip it and put the "Tool Chain Build" folder under the following folder (you need to create this folder first),
/Developer/Platforms/iPhoneOS.platform/Developer/Library/Xcode/Project Templates/iPhone Tool Chain

then you can see this Template when you create new project

(4) This template supports Build to device and release only, so you have to connect your iPhone to USB cable when build and go

(5) When using SDK framework to build old iPhone App, you would discover that some symbols will be missing when linking

(6) The Template also include MakeFile to build application that can be ssh to iPhone folder /Application

Friday, April 11, 2008

Convert apple encrypted img2 file to png

(1) get the source code from
http://pastebin.ca/977711
and name to it img2png.c

(2) get the libpng file from http://www.libpng.org/pub/png/libpng.html

(3) compile with
gcc img2png.c -lcrypto -lpng -o img2png


(4) Run
./img2png applelogo.img2 applelogo.png

Thursday, April 10, 2008

Find iPhone secret ramdisk decrypt key

This is one of the methods using Mac OS to find the ramdisk secret key of iPhone IPSW file

The method is stated in
http://iphonejtag.blogspot.com/2008/01/iphone-secret-key.html

After finding the decrypt key, you can use vfdecrypt (from my previous posts) to decrypt the iphone filesystem


For example, iPhone 2.0 beta firmware file (build 5A225c) is iPhone1,1_2.0_5A225c_Restore.ipsw


#!/bin/bash

# first extract the ramdisk image file from the ipsw file
unzip -o iPhone1,1_2.0_5A225c_Restore.ipsw 018-3476-4.dmg -d .

# print out the size of the file (dump the 13th to 16th byte of the file) using
echo `hexdump -s12 -n4 -e '"%d\n"' 018-3476-4.dmg` / 512 | bc

# the output will be 37464 for this case

# strip off the first 0x800 bytes and the trailing certificate
dd if=018-3476-4.dmg of=018-3476-4.stripped.dmg bs=512 skip=4 count=37464 conv=sync

# use the method of GEORGE HOTZ
openssl enc -d -in 018-3476-4.stripped.dmg -out ramdisk-018-3476-4.dmg -aes-128-cbc -K 188458A6D15034DFE386F23B61D43774 -iv 0

# print out the ramdisk key from the image
strings ramdisk-018-3476-4.dmg | egrep "^[0-9a-fA-F]{72}$"


The output of the script is below and the ramdisk key is at the last line of the output

Archive: iPhone1,1_2.0_5A225c_Restore.ipsw
inflating: ./018-3473-4.dmg
37464+0 records in
37464+0 records out
19181568 bytes transferred in 0.770523 secs (24894216 bytes/sec)
ea14f3ec624c7fdbd52e108aa92d13b16f6b0b940c841f7bbc7792099dae45da928d13e7


The ramdisk key is in the /usr/sbin/asr after mounted the ramdisk image.
strings /Volumes/ramdisk/usr/sbin/asr


The second method is to get the 8900decryptor.c from http://code.google.com/p/iphone-elite/wiki/8900decryptercode

and compile it using
gcc 8900decryptor.c -lcrypto -o 8900decryptor


using this command, you can get the decrypted image and the key as well
./8900decryptor 018-3476-4.dmg 018-3476-4.8900decrypted.dmg
strings 018-3476-4.8900decrypted.dmg | egrep "^[0-9a-fA-F]{72}$"

Moreover, you can mount the ramdisk 018-3476-4.8900decrypted.dmg directly
The ramdisk key is in the /usr/sbin/asr of this mounted ramdisk image.

If you find this info useful, please consider to $1 by clicking the Donate button.

Wednesday, April 2, 2008

Monday, March 24, 2008

First dollar donation received, THANK YOU

Delete iTunes in Mac OS X

Back up your ~/Music/iTunes library

To delete iTunes. On OS X, you can do that with:
# rm -rf /Applications/iTunes.app
# rm -rf /System/Library/PrivateFrameworks/MobileDevice.framework
# mv ~/Music/iTunes ~/Music/iTunes.7.6

Open Tool Chain for apple SDK available now

This allows you to build the 1.2.0 iPhone arm binary from source code using Open Tool Chain and the low level APIs.

That means you must have a 1.2.0 firmware iPhone and Apple iPhone SDK to test.

Read this
http://www.zdziarski.com/

sdk header can be obtained from here
svn co http://iphone-dev.googlecode.com/svn/branches/include-1.2-sdk

this is how to setup the build environment
http://iphone-dev.org/howto:using_sdk_with_toolchain_headers

try to build this from source
cvs -z3 -d :pserver:cvs@cvs.zdziarski.com:/usr/local/cvsroot co nesapp

Sunday, March 9, 2008

Modify iPhone SDK simulator Aspen

Although you have to pay if you want to run the iPhone debugger and have to wait for firmware 1.2.o update in order to have SDK binary run in your iPhone.  This is what can be done in the iPhone SDK beta with simulator Aspen

(1) Add Camera icon in the Aspen Simulator (despite iSight is not working in Aspen)
copy iPhone's
/Applications/MobileSlideShow.app/Info.plist
to Mac's 
/Developer/Platforms/AspenSimulator.platform/Developer/SDKs/AspenSimulator1.2.sdk/Applications/MobileSlideShow.app/
(2) Import your camera roll from your iPhone to the Simulator
iPhone's
/var/mobile/Media/DCIM
to Mac's 
/Users/[yourusername]/Library/Application Support/Aspen Simulator/User/Media/DCIM
(3) Add webclip in Simulator and change the webclip icon and change background in the Simulator
/Users/[yourusername]/Library/Application Support/Aspen Simulator/User/Library/WebClips
(4) Develop your own programs in XCode 3.1 or install the sample application from http://developer.apple.com/iphone/samples/index.action and run them in the simulator
(5) Install 3rd-party program manually in Mac


No Music Version

If you find this info useful, please consider to $1 by clicking the Donate button.